3D reconstruction of a submarine cave from underwater 360-degree video

How do you share the amazing experience of diving underwater caves with others?
In April 2021, Andrew Simpson and I dived Crystal Cave (New Zealand) with the intention of filming it for later 3D reconstruction. The model of the cave was to be included in a scuba diving simulator for Virtual Reality (VR) goggles. We wanted to share the experience of diving this cave with others, and find out how well VR is suited for teaching technical scuba diving procedures.
New Zealand is home to a few small beautiful submarine caves, especially at the Poor Knights Islands. Bruce W Hayward writes that these were mostly carved out no earlier than the second to last glacial period, when sea levels were lower. The pounding waves forced their way along pre-existing fracture planes of the massive rocks, gradually eroding them out to form guts, caves and arches.
A total of 16 caves are dotted around the Poor Knights Islands and are wallpapered with vibrant sponges and algae and home to schools of fish, moray eels, and rock lobster. Some are mere caverns, barely extending past the light zone. Others extend over 100m into the rock of the island.
One of these longer caves is Crystal Cave, also known as Stirling Cave and Scary Cave. It is located in Punawai Bay, approximately 400m south of famous Rikoriko Cave. The entrance to Crystal Cave lies in 20m of water on a sandy bottom dotted with rocks and kelp. From there, the single tunnel of the cave extends relatively level in an easterly direction for about 100m into the hard rock of Aorangi Island, the southern of the two largest islands of the Poor Knights Islands.

Crystal Cave is one of our regular dives, and as usual we carried rebreathers on our backs and redundant bail-out cylinders on our side. Primary and backup lights, dive computers, exploration reels and compass completed the usual set of cave diving equipment.
Recording 360-degree underwater video
Because the dive boat was anchored some way off, most of our dive time was allocated for travelling to and from the cave, and we had no more than 30 minutes for the actual cave dive.
30 minutes to record the entire 100m long cave was a lot less time than we had hoped for. Usually an undertaking like that spans several dives, as you have to stop every few meters to take photos and record depth, distance, and direction. How much could we really hope to achieve in just 30 minutes?
With time not on our side we put all our hopes on technology and the unusual piece of equipment that we carried: A stereoscopic 360-degree camera inside a waterproof housing.

The camera of choice was a Insta360 Pro 2, housed in the Mantis Sub underwater housing which I had developed. To light the cave we mounted six Light & Motion Sola Video 3800 lights on a short stick above the housing. A small float at the top provided 700gr of lift and made the whole setup neutrally buoyant.
The Insta360 Pro 2 camera has six lenses arranged in a circle around the equator of the camera. Each lens has a field of view of 200 degrees, and a fixed aperture of F2.4. The lenses project onto six 1/2.3” sensors that record at a resolution of 3840x2200 pixels and bitrate of 120MBit/s each. In addition to the image the camera records position information from the internal accelerometer. This data is used to stabilise the video during stitching.
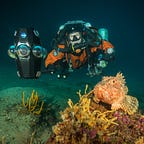
After checking our equipment, gas supply, and turning on cameras and lights we entered the cave. I swam ahead holding the 360-degree camera rig, and Andrew followed behind with his DSLR and strobes. The slow steady swim to the end chamber and back took 25 minutes. During this time the 360-camera captured a total of 130GB of data — about 1GB per lens per minute. You can watch the 360 video of our dive into the cave on YouTube.

Creating the 3D model
Back home, we downloaded the individual recordings from the camera and used the free Insta360 Stitcher program, supplied with the camera, to combine them into one equirectangular 8K 360-degree video file using this process.
For the 3D reconstruction we choose Agisoft Metashape, a powerful software for photogrammetry / 3D reconstruction that can create a 3D model from spherical source material. We extracted 1468 still shots (two frames per seconds) with a resolution of 7680x3840 (29 Megapixels) each.
After importing the photos into Metashape, the process to create the 3D model includes several steps:
- Align photos and identify tie points. These are points that show the same feature in two or more photos. This step took 1 hour 14 minutes to calculate on a PC with Intel i9 processor, 64 GB memory and NVidia RTX2080TI graphics card.
- Set reference coordinates by providing real position data for three or more points.
- Build a depth map and dense cloud. These contain relationship between the tie points. This step took 4 hours 20 minutes to calculate.
- Filter the dense cloud to remove points that are merely visual noise, and delete unnecessary points.
- Generate a mesh of connected triangular shapes areas from the point cloud. The mesh represents the surface area of the cave. This step took 30 Minutes.
- Texture the surface areas of the mesh from the original photos. The mesh and textures together form the 3D model. This step took 3 hours 40 Minutes to calculate.
- Delight the textures to smooth out dark and light sides of the model and also light up surface areas that were found to be too dark.
- Export the 3D model — for sharing and use in other software.
Overall it took close to 11 hours of processing on a PC with Intel i9–10850K processor, 64 GB memory and NVidia RTX2080TI graphics card to create a 3D model with 12 Million faces from 1468 spherical photos.


Sharing the 3D model online
After exporting the model as a file in OBJ format, the team uploaded it to the Construkted Reality website, where it can be viewed and explored online on any device with a standard web browser.
Construkted, Sketchfab, and other website are a great way to share a 3D model and to explore the structure that it represents. They are powerful tools to plan further dives and extract accurate measurements and other scientific data.

Why Virtual Reality
The unrestricted movement, visibility, and time that 3D sharing websites provide to explore a model also mean they fall well short when it comes to simulating the actual challenge of diving a large structure.
Visibility is usually less than perfect, often only a few meters. That makes it hard to figure out where one is exactly, and which way one has to go. Currents and particulate in the water further complicate matters and disorient the diver. Every task requires accessing and handling equipment and then safely stowing it away so it doesn’t get lost. All that takes time, and breathing gas, which needs to be managed before anything else. The task that one set out to do can quickly become secondary to survival.
Many of these challenges can be simulated very well in Virtual Reality. The underlying game engines provide good physics and lighting simulation that create a convincing representation of what the dive site looks like in real life. All world interactions happen through hand controllers in a realistic manner. That requires the player to plan ahead and perform movements that are very similar to what they would be when actually diving — taking a light from the harness, checking the dive computer, inflating and deflating the BCD to move up or down in the water column, etc.
And just like in real life time is ticking — virtual cylinders are being emptied with every simulated breath, and the decompression obligation is increasing.
Building the VR diving simulator
The reconstructed model had some holes near the top, where the light from lighting rig mounted on the camera hadn’t reached all parts of the cave due to the narrow pyramidal shape of the cave near the top. These holes had to be closed before the model could be used successfully in a simulator.
To prepare the model for the game engine, we imported the model into Blender, an open source 3D software. After closing all holes we decimated the face count of the model from 12 Million to 1.5 Million faces, which provided a good compromise between detail and model size. 1.5 Million faces is however still a large amount to render for less powerful VR goggles, so we then decided to split the model into many smaller segments. This allows the game engine to use a process called occlusion culling, where only the part of the model that is currently visible by the player is rendered. The parts of the model that are not visible to the player are not rendered and don’t take up resources.

With the cave model ready, it was time to program the simulator around it. We choose the Unity game engine as we were already familiar with it from other work. We then wrote a number of scripts, small programs, that implement realistic buoyancy, BCD inflation/deflation, lights, dive computer, a harness system, and DPV (Diver propulsion vehicle), as well as interactions through the hand controllers. The goal was to make it feel as realistic as possible by requiring the player to use the same hand movements to perform a task that they would use when diving.


Diver feedback
Andrew has been showing the simulator to visitors to his dive shop and received the most amazing feedback; People that know the cave commented on how similar exploring it in VR is to diving it.
As far as a realistic simulation for training goes, there’s still a lot of programming to be done. But the visual experience already feels very real and the initial feedback is very encouraging.
“I’m not going in there, why would I do that?” said one of the visitors who tried out the simulator.
While many players were initially cautious, everybody did venture deeper into the cave and then enjoyed the experience tremendously. Some even came up with practical use cases spontaneously.
Dr. Matt Carter, Research Director for Major Projects Foundation, commented on how useful the combination of 3D reconstruction and VR would be to familiarise new team members with real archaeological sites and to practice planned dives.

Lessons learned
During processing of the data, we noticed a few mistakes that we had made during capture:
- We recorded a video as we were under time pressure and most familiar with that process. One disadvantage of video is reduced quality of extracted still shots, introduced by compression and motion blur. A timelapse recording could have provided photos with reduced motion blur and more detail. For this a shutter speed of approximately 1/100th would be necessary (Insta360 Pro2’s lens/sensor combination, moving at 0.5m/s relative to a subject 2m distant).
- While the visual noise introduced by shooting at ISO 400 isn’t a noticeable problem in the video, it resulted in noticeable noise in the point cloud that had to be reduced in a separate step. Shooting at ISO 200 or 100 would probably have avoided this problem.
- The lighting setup was not ideal. For this cave with a pyramidal shape that narrows at the top, it would have been better to mount the majority of the lights below the camera, and have only one or two lights above, pointing up. This would have provided more even lighting.
- Despite delighting the model showed variations in texture color where the wall was very far from the camera. Care should be taken during capture to maintain an equal distance of approximately 2m to every surface. Where this is not possible in one recording, additional recordings that follow a different path should be made and the photos swapped.
- A large oversight was not placing a few visual control markers at known distances to each other — at least three for the horizontal plane. These would have allowed us to quickly and accurately set reference coordinated to properly scale the model during reconstruction.
Despite these mistakes, we still managed to create an almost complete reconstruction of a large overhead environment from a single video that was shot in a very short amount of time with virtually no preparation.
Everything considered, we think 360-degree video has the potential to dramatically reduce the time necessary to capture data for 3D reconstruction of overhead environments at impressive detail.
Links: